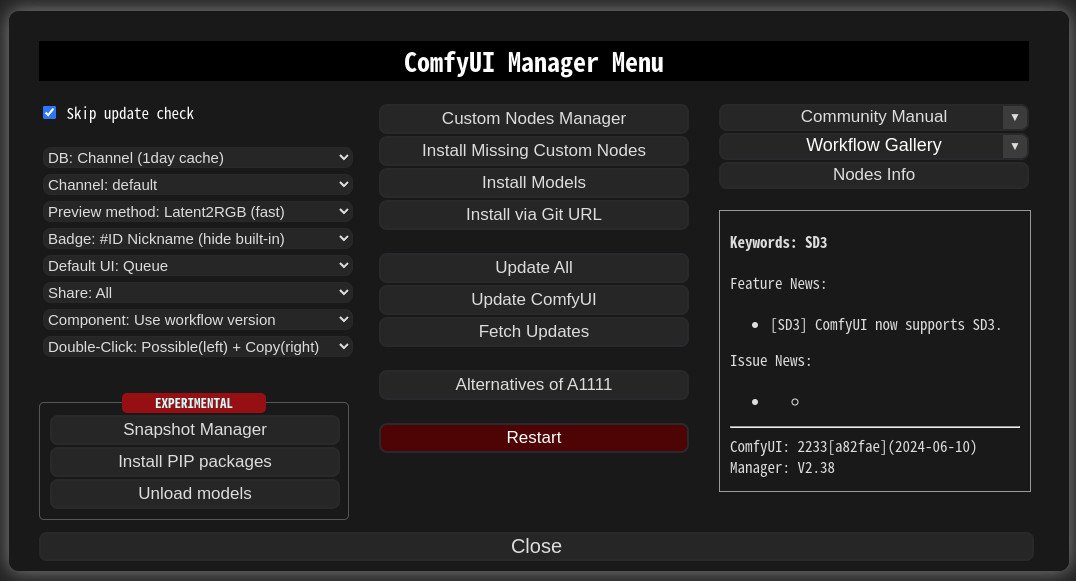
ComfyUI-Manager is an extension built to improve the usability of ComfyUI. It provides management functions for installing, removing, disabling, and enabling various custom nodes within ComfyUI. Additionally, the extension includes a hub feature and convenient tools for accessing a wide range of information within the platform.
Installation
Method 1: General Installation (ComfyUI-Manager Only)
To install ComfyUI-Manager alongside an existing ComfyUI installation, follow these steps:
- Open a terminal or command prompt and navigate to the
ComfyUI/custom_nodesdirectory. - Run the command:
git clone https://github.com/ltdrdata/ComfyUI-Manager.git
- Restart ComfyUI.
Method 2: Installation for Portable ComfyUI Version (ComfyUI-Manager Only)
To install ComfyUI-Manager for the portable version of ComfyUI, follow these steps:
- Install Git from here.
- Choose the standalone version.
- Select the option: “Use Windows default console window.”
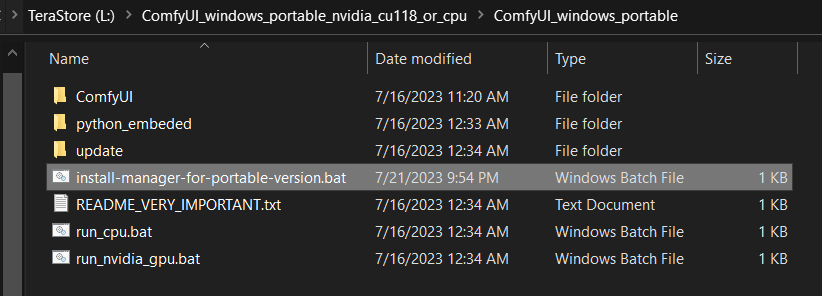
- Download the
install-manager-for-portable-version.batscript into the “ComfyUI_windows_portable” directory. - Double-click the
install-manager-for-portable-version.batfile to execute the installation.
Method 3: Installation via Comfy-CLI (ComfyUI and ComfyUI-Manager)
Recommended: Comfy-CLI offers a range of features for managing ComfyUI directly from the command line. To install both ComfyUI and ComfyUI-Manager simultaneously, follow these steps:
Prerequisites: Python 3, Git
For Windows:
- Set up a virtual environment:
python -m venv venv - Activate the virtual environment:
venv\Scripts\activate - Install Comfy-CLI:
pip install comfy-cli - Install ComfyUI:
comfy install
For Linux/OSX:
- Set up a virtual environment:
python -m venv venv - Activate the virtual environment:
. venv/bin/activate - Install Comfy-CLI:
pip install comfy-cli - Install ComfyUI:
comfy install
Method 4: Installation for Linux with Virtual Environment (ComfyUI + ComfyUI-Manager)
To install ComfyUI along with ComfyUI-Manager on Linux using a virtual environment (venv), follow these steps:
Prerequisites: python-is-python3, python3-venv, Git
- Download the
install-comfyui-venv-linux.shscript into an empty directory where you want to install ComfyUI.
- ComfyUI will be installed in a subdirectory of the chosen directory, which will contain the generated executable script.
- Make the script executable:
chmod +x install-comfyui-venv-linux.sh - Run the installation script:
./install-comfyui-venv-linux.sh
Installation Precautions
- DO: Ensure that the ComfyUI-Manager files are correctly placed in the
ComfyUI/custom_nodes/ComfyUI-Managerdirectory. - DON’T: Install in a compressed file format.
- Avoid decompressing files directly into the
ComfyUI/custom_nodeslocation, as this may place files like__init__.pyincorrectly in that directory. - If this occurs, remove all ComfyUI-Manager files from
ComfyUI/custom_nodes. - Do not decompress into a path like
ComfyUI/custom_nodes/ComfyUI-Manager/ComfyUI-Manager. If this happens, move the files fromComfyUI/custom_nodes/ComfyUI-Manager/ComfyUI-ManagertoComfyUI/custom_nodes/ComfyUI-Manager. - Avoid decompressing into a path like
ComfyUI/custom_nodes/ComfyUI-Manager-main. This may cause ComfyUI-Manager to operate but not be recognized for updates and may lead to duplicate installations. Rename the directory fromComfyUI/custom_nodes/ComfyUI-Manager-maintoComfyUI/custom_nodes/ComfyUI-Manager.
To execute ComfyUI: Depending on your system configuration, run either ./run_gpu.sh or ./run_cpu.sh.
Google Colab Notebook
This repository includes Colab notebooks that enable you to easily install and use ComfyUI, along with ComfyUI-Manager. To get started with ComfyUI, simply click on this link.
Features:
- Support for installing ComfyUI
- Basic installation support for ComfyUI-Manager
- Automatic installation of custom node dependencies upon restarting the Colab notebook
How To Use ComfyUI-Manager
Click “Manager” button on main menu.

If you click on ‘Install Custom Nodes’ or ‘Install Models’, an installer dialog will open.
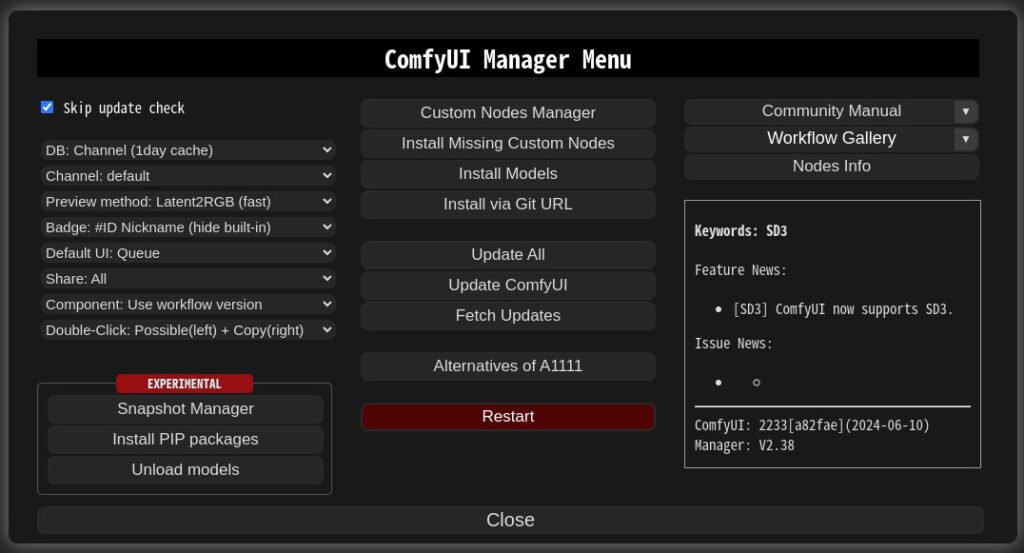
There are three database modes available: DB: Channel (1-day cache), DB: Local, and DB: Channel (remote).
- Channel (1-day cache): This mode uses cached channel information with a validity period of one day, allowing for quick display of the list. The cache is updated when it expires, when there is no existing cache, or when external information is retrieved via the Channel (remote). This mode is set as the default every time you start ComfyUI.
- Local: This mode utilizes information stored locally within ComfyUI-Manager. The data is only updated when you manually update ComfyUI-Manager. Custom node developers should use this mode when registering or testing their nodes in
custom-node-list.json. - Channel (remote): This mode fetches information directly from the remote channel, ensuring the display of the latest list. If network issues prevent retrieval, it will fallback to using local information.
The Fetch Updates menu allows you to retrieve update data for custom nodes locally. To apply the actual updates, you must click the Update button in the Install Custom Nodes menu.
Click ‘Install’ or ‘Try Install’ button.
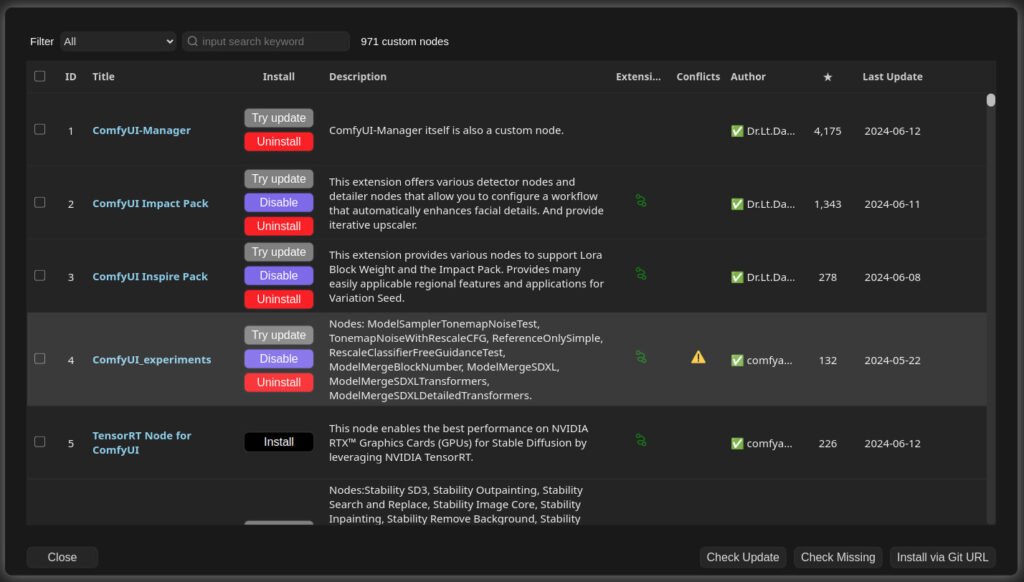
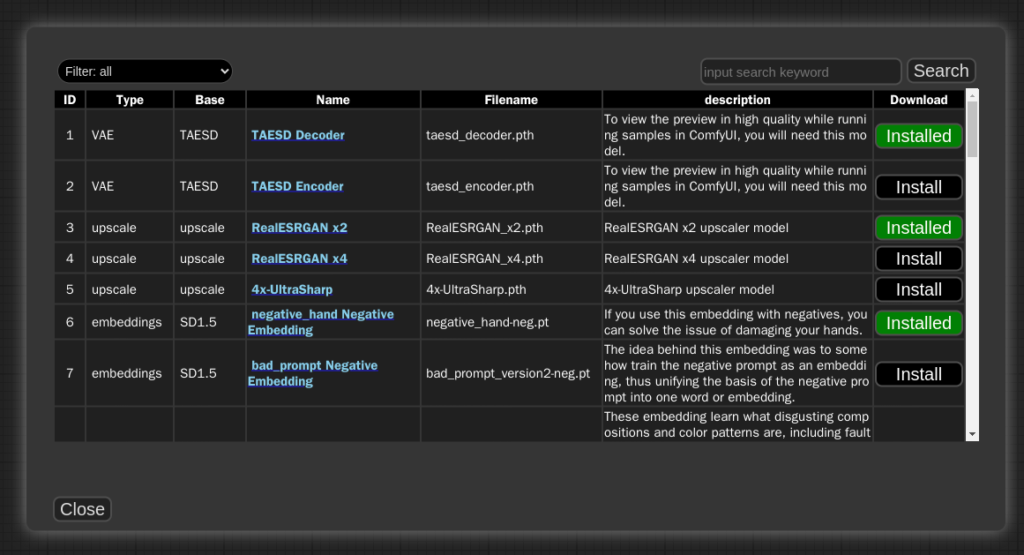
- Installed: Indicates that the item is already installed.
- Install: Click this button to install the item.
- Try Install: For custom nodes where installation information cannot be confirmed, click this button to attempt installation.
If a red background Channel indicator appears at the top, it signifies that the channel is not set to the default. This can result in many custom nodes not being visible since the amount of information differs from the default channel.
Channel settings have a wide-reaching impact, affecting not just the node list but also all functions like “Update all.” Nodes with a yellow background under Conflicted Nodes indicate conflicts with other extensions in the respective extension. These conflicts need to be resolved by the developer, and users should be aware that such nodes may not function correctly and might require special installation.
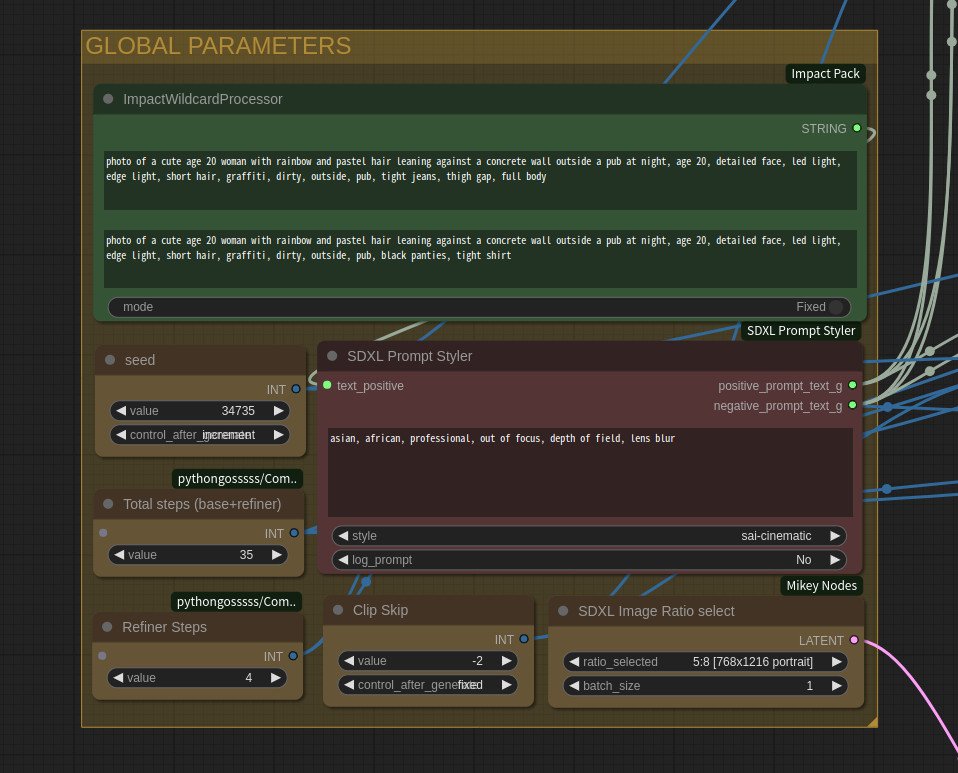
In the menu, if you select Badge: Nickname, Badge: Nickname (hide built-in), Badge: #ID Nickname, or Badge: #ID Nickname (hide built-in), an information badge will appear on the node. Selecting “hide built-in” hides the 🦊 icon, which denotes built-in nodes. Nodes without any indication on the badge are custom nodes that the Manager cannot recognize. Badge: Nickname displays the custom node’s nickname, while Badge: #ID Nickname also includes the internal ID of the node.
Share:


You can share your workflow by clicking the Share button at the bottom of the main menu or by selecting Share Output from the Context Menu of the Image node. Currently, sharing is supported via comfyworkflows.com, openart.ai, youml.com, as well as through the Matrix channel.
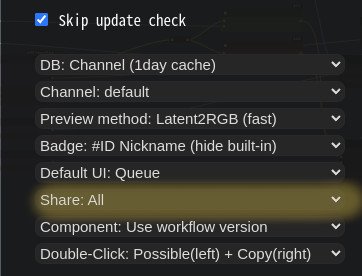
In the Share settings of the Manager menu, you can configure how the Share button in the Main menu or the Share Output button in the Context Menu behaves:
- None: Hides the Share option from the Main menu.
- All: Displays a dialog where you can select a title for sharing.
Snapshot-Manager
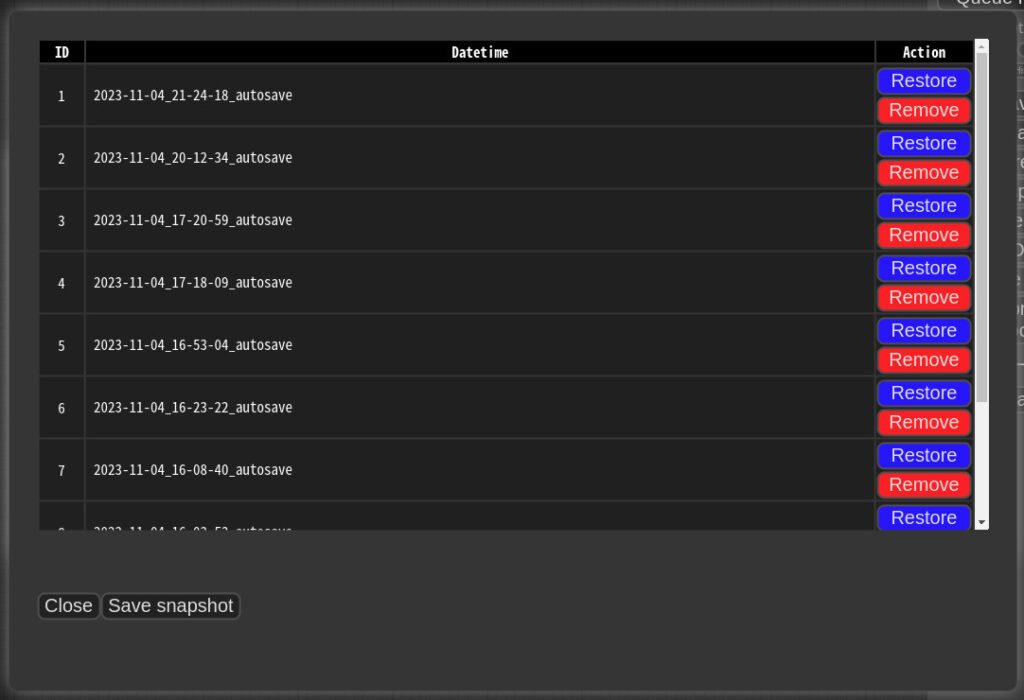
- When you press Save snapshot or use Update All in the Manager Menu, a snapshot of the current installation status is saved in the
ComfyUI-Manager/snapshotsdirectory. - You can rename the snapshot file.
- Press the Restore button to revert to the installation status of the selected snapshot.
- Note that snapshot support is incomplete for custom nodes not managed by Git.
- When you press Restore, it will take effect on the next ComfyUI startup.
- The selected snapshot file is saved in
ComfyUI-Manager/startup-scripts/restore-snapshot.json, and upon restarting ComfyUI, the snapshot is applied and then deleted.
cm-cli: Command Line Tools for Power Users
The cm-cli tool provides command-line access to ComfyUI-Manager’s features, allowing users to manage ComfyUI without running the interface. For more information, please refer to the cm-cli documentation.
How to Register Your Custom Node in ComfyUI-Manager
To register a custom node, add an entry to the custom-node-list.json file located in the root of ComfyUI-Manager and submit a Pull Request (PR). Before submitting the PR, ensure that you enable the “Use local DB” option and verify that the custom nodes list loads correctly in the “Install custom nodes” dialog to avoid any JSON syntax errors. The remaining JSON updates will be handled by scripts in the future.
Custom Node Support Guide
The current system clones the git repository and installs dependencies listed in requirements.txt via pip, followed by the execution of the install.py script. Future discussions will address additional specifications for custom node support.
To update either the custom-node-list.json or model-list.json file, submit a pull request. The scanner provides a function to detect missing nodes based on specific patterns. Alternatively, you can provide a node_list.json file manually.
Node Class Mappings
Node class mappings should be defined in the NODE_CLASS_MAPPINGS dictionary within the custom node’s Python file. If you include a docstring in the file header, it will be used to manage the node database within the Manager. The nickname provided will appear on the node’s badge. If no nickname is provided, the title will be truncated to 20 characters and used as the nickname.
Special Purpose Files (Optional)
node_list.json: Manually provides a list of nodes if the node pattern is unconventional.requirements.txt: Lists pip dependencies to be installed automatically.install.py: Script executed automatically during installation.uninstall.py: Script executed automatically during uninstallation.disable.py: Script executed automatically when the node is disabled.enable.py: Script executed automatically when the node is enabled.
Component Sharing
Copy & Paste:
You can share components by copying and pasting in the following JSON format:
{
  "kind": "ComfyUI Components",
  "timestamp": <current timestamp>,
  "components": {
    <component name>: <component nodedata>
  }
}
Drag & Drop:
Drag and drop a .pack or .json file to add the corresponding components. A single component will add a node, but multiple components will not automatically add nodes.
Demo Page
When pasting a component from the clipboard, it supports text in the JSON format mentioned above. Components will be saved in ComfyUI-Manager/components with specific versions, datetime stamps, packnames, and categories as needed.
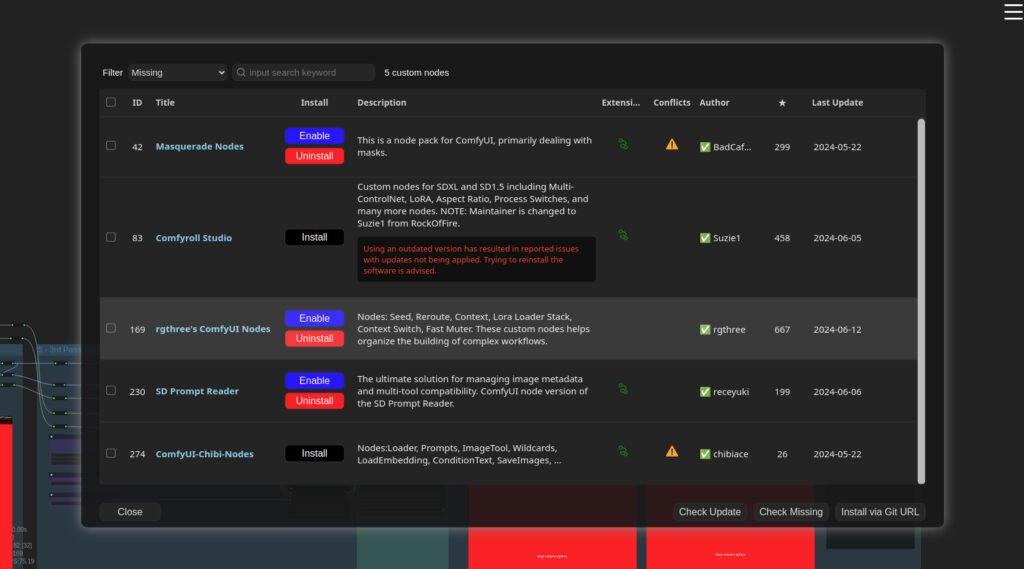
Support of missing nodes installation

When you click on the Install Missing Custom Nodes button in the menu, a list of extension nodes is displayed. This list shows nodes that are not currently present in your workflow but are required for it to function correctly. This feature helps you easily identify and install the necessary custom nodes to ensure that your workflow operates as intended.
Additional ComfyYU-Manager Features
Logging to File
This feature is enabled by default. You can disable it by setting file_logging = False in the config.ini file.
Fix Node (Recreate)
Right-click on a node and select Fix Node (Recreate) to recreate it. This action resets the widget’s values while preserving connections with matching names. This is useful for correcting errors in nodes from older workflows that may be incompatible with updated custom nodes.
Double-Click Node Title
You can configure the double-click behavior for nodes in the ComfyUI-Manager menu:
- Copy All Connections: Copies all connections of the nearest node within a 1000-pixel distance from the center.
- Copy Input Connections: Copies only the input connections of the nearest node.
- Possible Input Connections: Connects all outputs that match the closest type within the specified range.
Double-clicking the left half of the title performs Possible Input Connections, while the right half performs Copy All Connections.
Prevent Downgrade of Specific Packages
To prevent downgrading certain packages, list them in the downgrade_blacklist section of the config.ini file, separated by commas:
downgrade_blacklist = diffusers, korniaCustom Pip Mapping
Create a pip_overrides.json file to override specific pip package installations. Refer to the pip_overrides.json.template file for guidance.
Use aria2 as Downloader
For details on configuring aria2 as the downloader, refer to the relevant documentation.
Scanner
Run the scan.sh script to:
- Update
extension-node-map.jsonby pulling or cloning custom nodes listed incustom-node-list.jsoninto~/.tmp/default. Use the--skip-updateoption to skip this step. - Update
github-stats.jsonusing the GitHub API. Set your token withexport GITHUB_TOKEN=your_token_hereto avoid rate limits. Use the--skip-update-statoption to skip this step, or--skip-allto skip both steps.
Troubleshooting
- If
git.exeis installed in a non-standard location, specify its path ingit_exe =in theconfig.inifile. - If updating ComfyUI-Manager fails, run the following commands in the ComfyUI-Manager directory:
git update-ref refs/remotes/origin/main a361cc1 && git fetch --all && git pullAlternatively, use the update-fix.py script.
- For issues with front-end nodes like
PreviewTextNodefromComfyUI_Custom_Nodes_AlekPet, note that missing nodes are not provided. - For
vid2vidcompatibility issues, note that it is not being updated. - For the error message Overlapped Object has pending operation at deallocation on ComfyUI-Manager load under Windows, add
windows_selector_event_loop_policy = Truetoconfig.ini. - For SSL certificate errors (
CERTIFICATE_VERIFY_FAILED), addbypass_ssl = Truetoconfig.ini.
Security Policy
Configure security settings in config.ini:
- strong: Disallows high and middle level risky features.
- normal: Disallows high level risky features; middle level risky features are available.
- normal-: Same as normal, but disallows high level risky features if
--listenis specified and does not start with 127. - weak: All features are available.
High Level Risky Features: Install via git URL, pip install, installation of custom nodes not registered in the default channel, display terminal log.
Middle Level Risky Features: Uninstall/update/fix custom nodes, installation of custom nodes registered in the default channel, restore/remove snapshot, restart.
Low Level Risky Features: Update ComfyUI.
Disclaimer
This extension simply provides the convenience of installing custom nodes and does not guarantee their proper functioning.
Credit
ComfyUI/ComfyUI – A powerful and modular stable diffusion GUI.
And, for all ComfyUI custom node developers.
