ComfyUI-Mac-Installer
ComfyUI leads the way in AI-powered image generation, bringing boundless creative potential to users. However, its advanced capabilities have often been hidden behind a complex installation process—until now. Aiming to make AI accessible to everyone, whether you’re a macOS beginner or an experienced developer, we introduce the ComfyUI-Mac-Installer.
Making Installation Easy
This project bridges the gap between the sophisticated world of ComfyUI and users eager to explore AI image generation without the technical hassle. The ComfyUI Mac Installer offers a seamless setup process, letting you focus on creativity rather than configuration.
How to Use
Installation Steps
- Download the Package: Download the
ComfyUI-Mac-installer apps.zip, which includesInstallComfyUI.appandComfyUI Starter.app. Unzip the file, ensuring that both apps are placed in the same directory for proper functionality. - Launch the Installer: Locate
InstallComfyUI.appin Finder, right-click, and select Open to bypass macOS Gatekeeper on the first launch. - Setup Process: The installer will open a terminal window to set up necessary dependencies and configure the environment for ComfyUI. After setup, it will automatically start the ComfyUI server and open your default browser. (In some cases, you may need to refresh the browser.)
Important Notes
- Stopping the Server: To stop the server, close the terminal window or press Ctrl+C in the terminal where the server is running.
- Re-running the Installer: You only need to run the installer again if you’re setting up ComfyUI on a new machine or after a clean installation.
- Permissions: The installer may request permissions to install software or modify system settings. Be sure to grant these permissions when prompted.
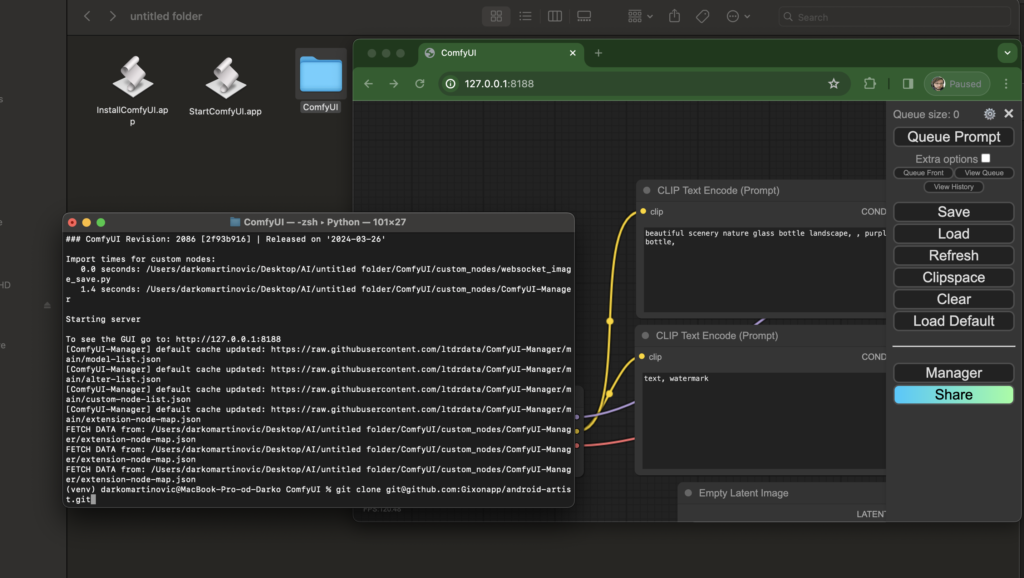
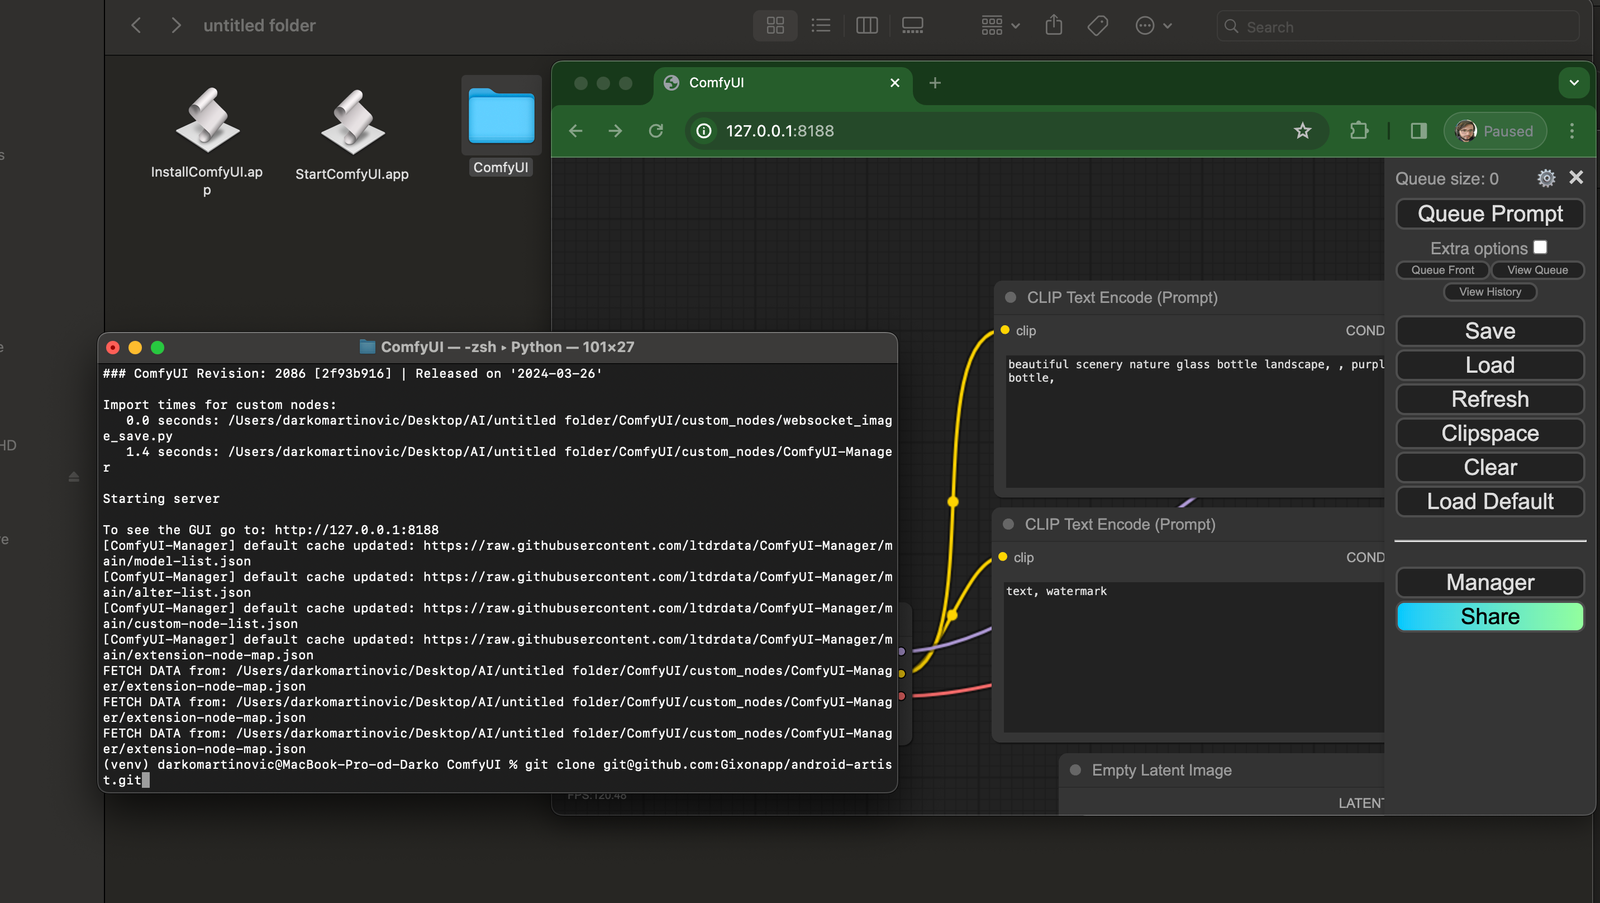
- After Installation: After a successful installation, you’ll see a new ComfyUI folder in the same directory as
InstallComfyUI.app. The terminal will display a message like “To see the GUI, go to: http://127.0.0.1:8188”, and your browser will open to this address, as shown in the example image below:
Enjoy the simplicity of ComfyUI-Mac-Installer and unlock your creative potential without the technical barriers!

StartupComfyUI
After completing the installation, you can use the StartupComfyUI.app to start the server whenever needed (the server starts automatically after installation, but this app allows you to restart it if it stops).
- Locate the App: Find the
StartupComfyUI.appin the same directory as the ComfyUI installation folder. - Launch the App: Right-click on
StartupComfyUI.appand select Open. This will start the ComfyUI server and open the project in your default web browser automatically.
Tested Devices
To ensure smooth operation and compatibility, the ComfyUI-Mac-Installer has been tested on the following devices:
- MacBook Pro (16-inch, 2019)
- Processor: 2.3 GHz 8-Core Intel Core i9
- Memory: 16 GB
- MacBook Pro M3 Max (16-inch, Nov 2023)
- Processor: M3 Max
- Memory: 48 GB
- MacBook Pro M1 (13-inch, 2021)
- Processor: M1 Pro
- Memory: 16 GB
Script Actions
InstallComfyUI Script Actions:
- Identifies the script’s location to execute commands.
- Installs Homebrew if not already present, providing a package manager for macOS.
- Installs Python through Homebrew to ensure compatibility.
- Clones the ComfyUI Git repository to your local machine.
- Creates and activates a Python virtual environment, isolating dependencies.
- Installs required Python packages, including
torch,torchsde,torchvision,einops,transformers,safetensors,aiohttp,pyyaml,Pillow,scipy,tqdm,psutil, andkornia. - Clones the ComfyUI-Manager Git repository into the setup directory.
- Starts a local server running the main script within the virtual environment and opens the project in a web browser.
StartupComfyUI Script Actions:
- Identifies its file path to ensure accurate command execution.
- Converts the file path to a POSIX path for compatibility with macOS Terminal commands.
- Navigates to the ComfyUI project directory.
- Launches the ComfyUI server within the Python virtual environment.
- Opens your default web browser to
http://127.0.0.1:8188for accessing the ComfyUI interface.
Troubleshooting
- Permissions: Ensure you have the necessary permissions to install software and run scripts.
- Internet Connection: A stable internet connection is required for downloading packages and cloning repositories.
- Script Errors: Check the Terminal output for any errors and follow the prompts to resolve them. Common issues include network interruptions, permission issues, or missing dependencies.
- “Site Cannot Be Reached” Error: Verify that the server is running in the Terminal. If the browser opens before the server is ready, simply refresh the page once the server is up. If necessary, start the server using
StartupComfyUI.appor by runningpython main.pyin the terminal from the project directory.
Star and Share If You Find It Useful!
This project was created to simplify the often time-consuming setup process of ComfyUI. If you found it helpful, please consider starring the repository and sharing it with others who might benefit. Let’s focus on creativity, not on setup!
Read related articles in our Blog:
