One of the strengths of ComfyUI is its node-based system, which lets you create new workflows by combining existing nodes in various ways. While the built-in nodes cover a broad range of functionalities, there may be instances where you need a feature that isn’t available in the core nodes. Custom nodes allow you to develop these new features and share them with the community.
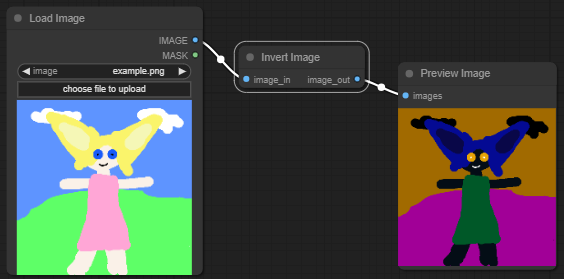
A custom node in ComfyUI, like any other node, takes an input, processes it, and generates an output. While some custom nodes handle complex operations, many are designed to perform a single, specific task. For instance, a simple custom node might take an image and invert its colors.
Client-Server Model
Comfy operates using a client-server model, where the server, built with Python, manages the core tasks such as data processing, model handling, and image diffusion. The client, developed in JavaScript, is responsible for the user interface.
Comfy can also function in API mode, where a workflow is sent to the server by an external client, such as another UI or a command line script.
Custom nodes
Custom nodes in Comfy can be categorized into four types:
- Server Side Only: Most custom nodes run exclusively on the server side. They are defined by a Python class that specifies input and output types, and includes a function to process the inputs and generate an output.
- Client Side Only: Some custom nodes modify the client UI without adding core functionality. These may not even introduce new nodes to the system.
- Independent Client and Server: These custom nodes offer additional server features and related UI enhancements, such as a new widget for a new data type. In most cases, communication between the client and server is managed by Comfy’s data flow control.
- Connected Client and Server: In rare cases, custom nodes require direct interaction between the UI and the server.
It’s important to note that any node requiring client-server communication won’t be compatible with API usage.
Custom Node CI/CD
When making changes to custom nodes, it’s easy to unintentionally break functionality in Comfy or other custom nodes. Testing across every operating system and various Pytorch configurations can be impractical.
Run Comfy Workflows Using GitHub Actions
Comfy-Action enables you to execute a Comfy workflow.json file directly on GitHub Actions. This tool supports downloading models and custom nodes, and it operates seamlessly across Linux, Mac, and Windows environments.
Results
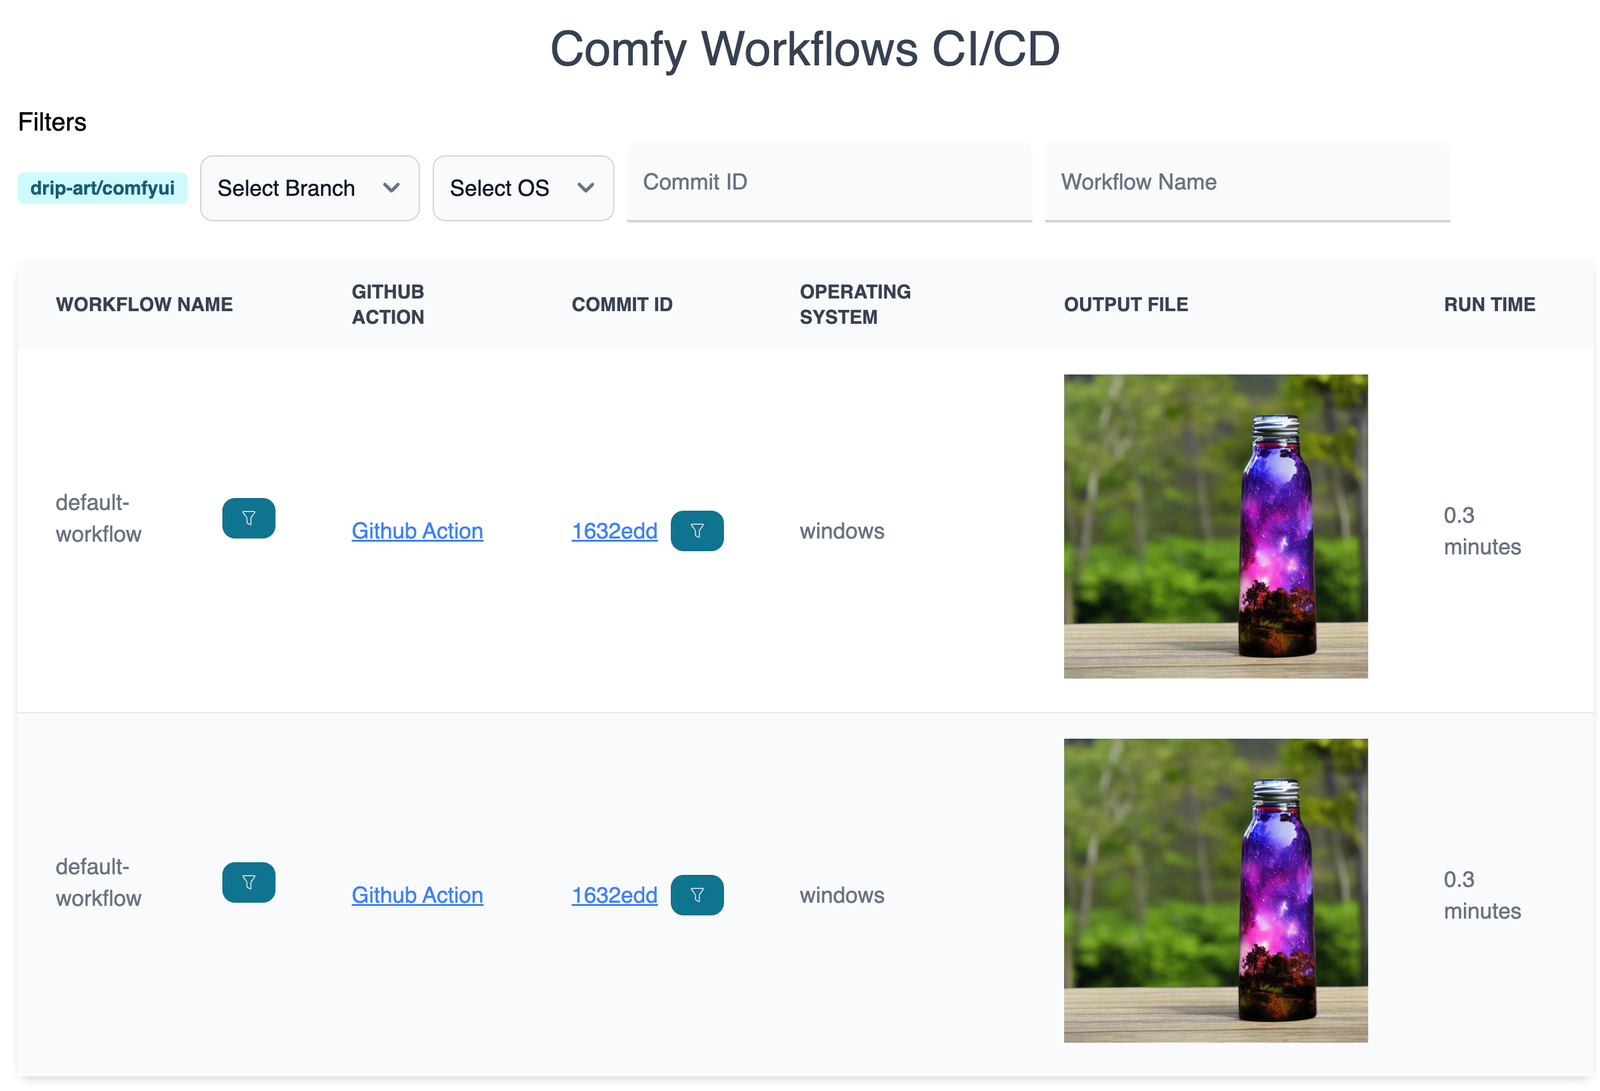
The output files generated by the workflow are uploaded to the CI/CD Dashboard, providing a final review step before committing new changes or releasing new versions of your custom node.

pyproject.toml
Node ID
The node ID, specified in the “name” field of the toml file, serves as the unique identifier for a custom node. This ID is used in URLs from the registry, and users can install the node by referencing its name:
comfy node install <node-id>The node ID must be under 50 characters long and can only include alphanumeric lowercase characters, hyphens, underscores, and periods. Consecutive special characters are not allowed, and the ID cannot begin with a number or special character.
Version Number
The registry follows semantic versioning, which uses a three-digit version number (X.Y.Z) to indicate the specific release of a custom node:
- X: MAJOR changes that break previous versions.
- Y: MINOR changes that add new features and are backward compatible.
- Z: PATCH changes that fix bugs.
License
The license field is optional and expects a relative path to your license file, typically named LICENSE or LICENSE.txt:
license = { file = "LICENSE" }  ✅
license = "LICENSE"              ❌
Alternatively, you can reference the license by name. Common licenses include MIT, GPL, or Apache:
license = {text = "MIT License"} ✅
license = "MIT LICENSE"         ❌
Publisher ID
The publisher ID uniquely identifies the publisher and ideally matches your GitHub username. It’s also referred to as the username on the registry and appears after the “@” symbol on your profile page.
Icon
An optional field where you can provide an icon URL. It supports SVG, PNG, JPG, or GIF formats with a maximum resolution of 800px by 400px.
Custom Node API Overview
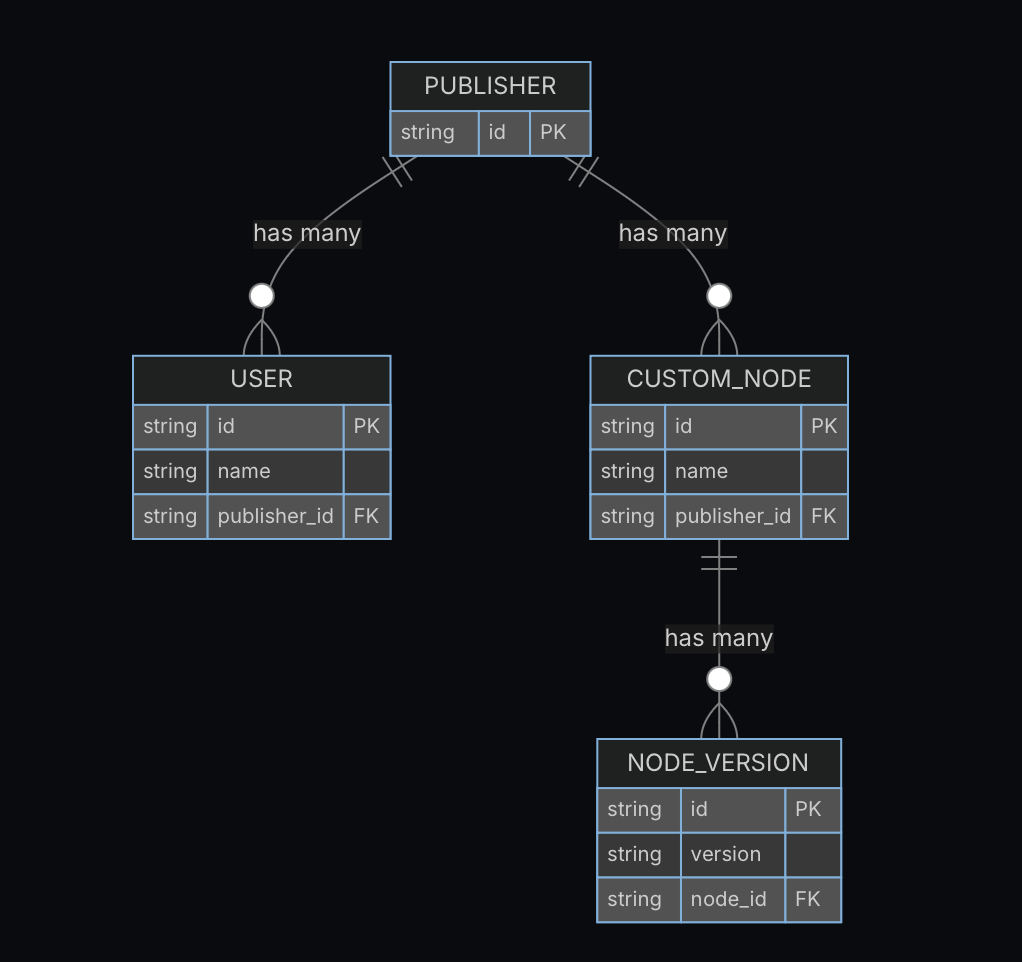
The Custom Node Registry follows this structure:

Commonly Used APIs
Also read:
